Showing posts with label Products. Show all posts

Friday, October 15, 2010

Got Colour Shapers?

For anyone out there who does any amount of sculpting in their armies - even just simple gap-filling, here's what I want you to do:

Step 1: Go and buy yourself some colour shapers.
Step 2: Go home and be amazed at how much they improve your sculpting.
Step 3: Send me rewards and money for changing your life! (Or at least a nice comment below).

I'm quite serious about Steps 1 and 2 - Step 3 is optional, but feel free to do it anyway!

These things are amazing, and I can't believe I got by without them before. And before you ask - no, I don't work for the company that makes them!


Essentially they look like a paintbrush, but instead of bristles they sport rubber tips of varying softness, shapes and sizes. The rubber means that your sculpting medium (such as Green Stuff) won't stick to it. At all (well, unless you use a very high ratio of yellow to blue). This allows the nice, smooth, shiny result you see people come up with in their sculpts. They come in soft (which have white tips) and firm (which have grey tips), which I'll mention in a second.

The same company also makes what they call Clay Shapers, which are the same thing but with very firm tips (which are black).

I have a range of shapes, with a couple of very firm shapers, a couple of firm and a few soft. I use the very firm ones to get the putty where I want it on the model and sculpt the basic shape I'm after. Next, the firm ones are used to add finer detail (such as folds in the cloth). Finally, if some details are too sharp, I use the soft shapers to lightly brush over the putty and smooth it out.

Using just these, I can get the basic sort of shapes I'm after. If I need to do finer detail, I do this with my metal tools - I bought Gale Force 9's sculpting kit which, although quite expensive, does come with a spiffy case. My girlfriend tells me it makes me look like a psychopathic dentist, about to torture people:


Anyway, that's how I do my sculpting - you can see some of my examples here (Death's Head veteran), here (Commissar's peak cap) and here (Counts-as Marbo).

I've still got a long way to go before I get really good, but it certainly helps to have the right tools for the job!

Saturday, August 7, 2010

Shameless Product Endorsement

Unfortunately, I'm not getting paid for this... Just a quick post to fill in the time until I get some more models up!

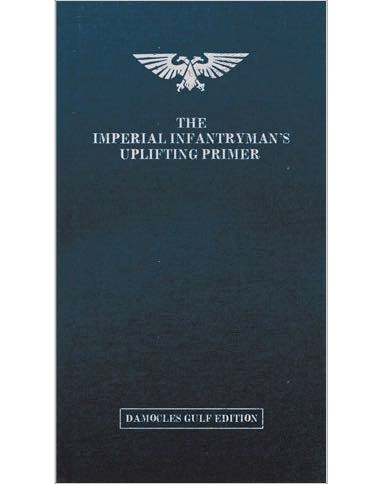
I picked up this book from Amazon a little while back - the Imperial Infantryman's Uplifting Primer:

 Image from the Black Library - www.blacklibrary.com

It's a fun read and I really enjoyed it, so I thought I'd recommend it to all of you!

If you haven't seen it before, it's a tongue-in-cheek look at the 40k universe from a lowly guardsman's perspective. It runs through basic training for the Imperial Guard as well as tips for defeating their enemies - such pearlers as "There is one rule to employ when fighting the tyranid: shoot the big ones."

Anyway, it's good for a light read, and has some useful background info in it too. I'd recommend it for any Imperial Guard player!

Friday, July 16, 2010

Air Time

Whoops! I knew it had been a little while since my last post, but I checked last night and it was over 2 weeks ago! This is just a quick update to let you know I'm still working away - I'll hopefully have more to show after the weekend!

I was excited to see this rock up in the post last week:


My brand new hobby compressor! It's a nice little unit, and is really quiet, which is a plus. I'll be putting it to good use once I get to painting my tanks. Hopefully I can replicate the techniques from the Imperial Armour Masterclass and create some nice-looking tanks! Stay tuned...

I've also been painting up the start of my next squad. I'm waiting to do all the sergeants together, then all the heavy weapons together etc., so that's why I still haven't finished off Squad 812. I'll be getting around to them soon though! So here's what's on my painting desk at the moment:


Most of the work has been done so far, which means they shouldn't be too far away! As I mentioned, I hope to have them done by the end of the weekend, so I should be posting another update then.

I'm in a bit of a groove with painting these guys at the moment, so I'm hoping I can keep that going and chew through a lot of painting pretty soon. That's the plan, at least! I must admit, it is a good feeling getting things finished after all this time.

Thanks for looking!

Friday, May 14, 2010

Decal Softener Title Fight!

In the blue corner, we have the man himself; the ruler of the ring; the bulldog of boxing - Revell Decal Soft. In the red, the lion with the left hook; the crusher of contenders, Mr. Hobby Mr. Mark Softer (and no, that's not a typo).

In painting up my Guardsmen, I've been starting to apply decals. I want to have a squad number and army symbol on the shoulderpads of my troops, and I want some consistency with these. I'm not confident enough with freehand to be able to repeat it 60-odd times, so decals are my best bet.

As I'm sure many of you know, this isn't straightforward when applying decals to irregular surfaces - the decals won't conform to surfaces without some extra effort*. Decal softeners are the go here, which is the focus of this article. Using the softeners, decal application is quick and easy, and produces some great results. I think squad markings really add a lot to a force!

I'd done my research and Micro-sol was a highly-recommended product when using decals. However, it turned out to be hard to track down in my local hobby stores. The place I looked at first stocked Revell Decal Soft, so I thought I'd grab it and give it a go.


The results were less than satisfactory. Although the decals did soften a little, even after multiple applications I never quite got them to sit completely flat. In the end, I decided to go looking for another product. In that hunt, I found this:


I hadn't heard a thing about this product, but it was a fair bit cheaper than the Revell so I grabbed a bottle. As it turns out, it's great! I can notice the decals softening straight away, and they conform very well to the surface. If you follow the usual tips, it will look like your decals are painted on.

So the procedure for my decal application is:

1. Paint the area of application with a gloss varnish. This gives a nice smooth surface for the decal to adhere to.
2. Apply the decal as usual: cut out the decal, float it in some water until the backing paper falls away, then pop the decal on the model using some tweezers. I find it helps to apply some decal softener to the surface first, but this isn't necessary.
3. Brush some decal softener over the decal and position the decal where you want it. This needs to be done quite quickly, as once the plastic of the decal starts to soften it will break apart if you try to move it. I use a cotton-tip to remove the excess fluid and flatten the decal.
4. Wait for the decal to dry. It will start to crinkle up a bit, but don't worry - that's normal. Just leave it to dry out. You might find you need another application of the softener, so do that if necessary. Sometimes this second application is a good time to use a cotton-tip again to flatten out wrinkles if they haven't entirely disappeared.
5. Once the decal has set, coat with another layer of gloss varnish - this will seal it in. If you've done all of this, it should hopefully be indistinguishable from the rest of the model.

If you've looked into decal application at all, you might have heard people talking about decal setters as well. These are designed to make the decal adhere to the surface better, after which the decal softener is applied. I haven't used a decal setter, but in my experience I haven't needed it.

Here's an example of an applied decal using the above method (a couple of crinkles are evident here under the bright light, but they don't show up once the matte varnish is applied):


This gets coated with a matte varnish later, and looks like this (with weathering having been applied):


So with a first-round knockout, the winner is Mr. Hobby Mr. Mark Softer!


* DISCLAIMER: The effort required may vary. I'll point out that I have been using Games Workshop decals. From what I've heard, softening products affect decals differently depending on their thickness and the paper used, so keep that in mind.

Tuesday, February 23, 2010

Imperial Armour Masterclass


(Image from Forgeworld)


I'd been eyeing off the Imperial Armour Masterclass Vol. 1 from Forgeworld for a while, and after seeing the results from people following it when modelling tanks, I was very keen to get my hands on a copy.

Luckily for me, I managed to grab a copy from someone quite cheap. It's a great book, and although most of the techniques can be found on the net in various places, it's nice to have them collected together in one place and actually see them all used on the same model. I'd highly recommend it to anyone wanting to go that step further with their modelling and painting.

Once I get on to my tanks (hopefully in the near future) I'll be using these techniques and aim to come up with something special!