Wednesday, February 24, 2010

Magnetised Heavy Weapon Teams

I started building this army under the previous codex, in which Heavy Weapons Teams were treated as two separate models sharing the same base. To keep track of this, I decided to magnetise the 'loader' (guy not on the heavy weapon) so he could be easily removed when killed.

Come the new codex, and the changes to HWTs that went with it, I simply use the removable guardsman as a wound counter - if the team takes one wound, the gunner comes off, and if it takes a second, it's dead.

To do this I simply used some 3mm x 1.5mm rare earth magnets. These are small enough to fit in the bottom of Cadian boots, and so one goes in there and the other on the bottom of the 60mm base. The gunners are held in place by the basing material, which is placed around their boots.

Here's a couple of pics to show this. (Sorry they're a bit blurry, I took them a while ago before I had a tripod for my camera):


In the top picture, if you look closely, you can see the footprints in the sand that keep the loader from swivelling around. In the second you can see the magnet embedded in the bottom of his boot.

So there you go - simple, and an easy way of keeping track of those wounds!

Tuesday, February 23, 2010

Imperial Armour Masterclass


(Image from Forgeworld)


I'd been eyeing off the Imperial Armour Masterclass Vol. 1 from Forgeworld for a while, and after seeing the results from people following it when modelling tanks, I was very keen to get my hands on a copy.

Luckily for me, I managed to grab a copy from someone quite cheap. It's a great book, and although most of the techniques can be found on the net in various places, it's nice to have them collected together in one place and actually see them all used on the same model. I'd highly recommend it to anyone wanting to go that step further with their modelling and painting.

Once I get on to my tanks (hopefully in the near future) I'll be using these techniques and aim to come up with something special!

Wednesday, February 17, 2010

The Trouble With Faces

So when I got to painting that first Guardsman you've seen here, I came to painting his face. Now I had read the GW tutorials and looked on the net at how other people were doing it, and figured I'd go ahead with the traditional method of several layers of highlighting etc.

What a mistake.

Not only did it take me way too long, especially if I planned to get an entire army done, but I couldn't make it look good. Part of the problem was the heat (I was painting during an Australian summer, so the paint was drying on my brush before I could get it on the face) but mainly my inexperience in painting. Consequently, My first attempts looked like this:


Which is a scrappy, chalky mess. After attempting a handful of faces like this, I got fed up and stopped. It had been suggested to me earlier that I should just use a wash, but for some unknown reason I decided to be stubborn. Anyway, after a few failures with layering I decided to give the wash a go, and got this result:


Which I much prefer. I can't remember exactly what ratio of paints it uses (I vary my skin colour across the army to look a bit more 'natural') but I know it's a mix of Elf Flesh with Tallarn Flesh. Using the foundation gives a good coverage of pigment which makes the process a lot quicker.

Then I do several light layers of Devlan Mud wash. I find that a single heavy layer doesn't do such a good job, as you get too much pooling of the ink and it doesn't bring out all the recesses, whereas a few carefully-applied layers achieves this.

Here's a lieutenant with my first (and only, so far) attempt at painting eyes - a bit wonky, but not too bad:


For dark skin I simply use Calthan Brown undercoat with Badab Black wash. Unfortunately I don't have a picture at the moment, but I think it looks quite good.

So there you go - listening to your friends' advice every now and then can pay off! I may eventually go back and do some layering, highlighting etc. like I had originally planned (especially on special characters and such) but I think this will do for now - at least until I get 2000 points or so built!

Thursday, February 11, 2010

The Cadian 77th Expeditionary Force

Well as it turns out, starting a blog just before you move house isn't exactly conducive to regular posting. Sorry about that!

Anyway, I'm basically all moved in now, with a dedicated 40k workspace so that should help me get moving with the army! Speaking of which, I promised last time I'd tell you a little bit about them.

The background story for my army was something I came up with to give me some good modelling opportunities and vice-versa, but I wanted the army to still be tied to Cadia somehow - I'm using Cadian models, after all. The idea is that the 77th Cadian Expeditionary Force was sent to an agri-world called Ordantas - close to the Eye of Terror - after a Chaos incursion there. Once they got there though, they were cut off from Cadia by a shift in the Warp.

Realising they were stuck indefinitely, the 77th integrated into the local populace. Several generations later, access to Ordantas was regained and the Imperium found a world entirely covered by a battlefield. The ground is criss-crossed by an extensive trench network, with the ground churned up by gunfire to mud and dirt. The Ordantans and the 77th had constructed large underground living spaces, where they produced barely enough food to survive, but which offered shelter from the ongoing war on the surface.

Every person on Ordantas has grown up in the midst of a brutal war against the forces of Chaos. They are tough soldiers, as the weak simply don't survive. Realising the quality of these troops, they have since been employed by the Imperium as a fighting force throughout the Galaxy, earning the respect and admiration of those they serve with and protect.

---

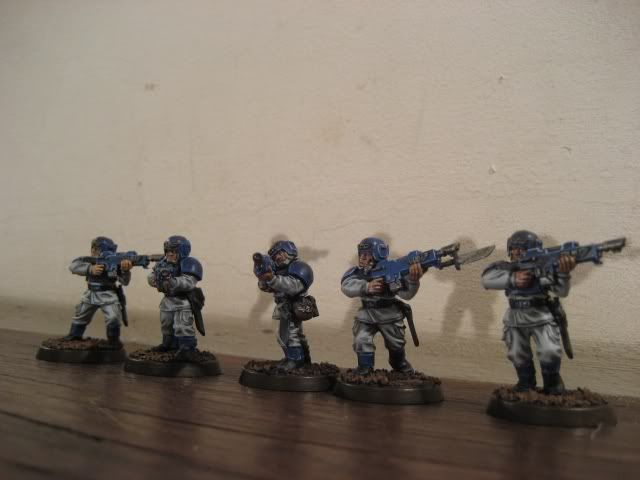
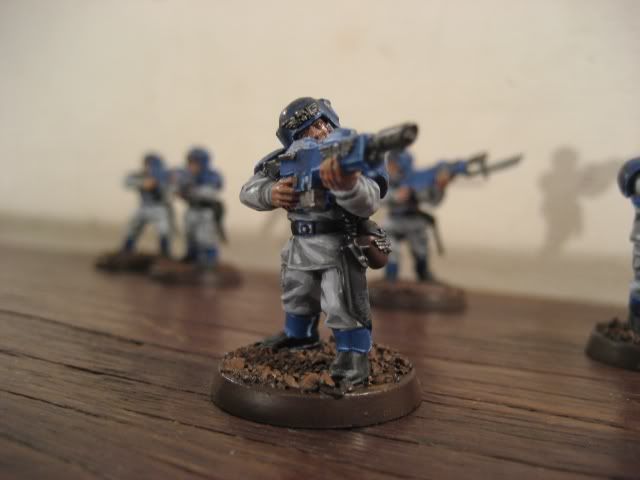
So with this force I basically wanted to convert and paint an army of tough, hardened troops. The bases will be covered with mud, barbed wire, duckboards etc. To convey the look of an army that's seen a lot of fighting, they will have chipped armour and 'used' looking equipment. At the same time though, I want the troops to have some level of uniformity. Consequently, the basic troops all have the same kit-out, but I'm doing conversions of arm poses and the like to hopefully produce some interesting looking guys.

For veterans, I'm being a bit more creative and doing more extensive modelling to set them apart, but with a theme tying them together.

Anyway that's enough writing for now, I'll talk more about the individual units as I get photos of them up! Here's another group of troops I painted a long time ago, they still need some work but will do for now!